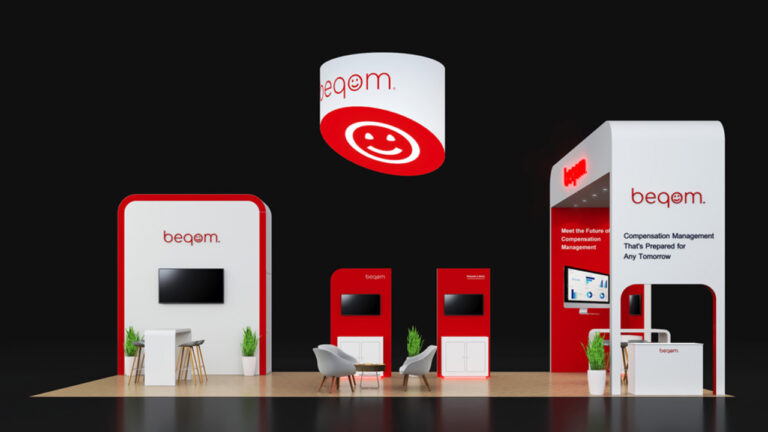

Choosing a trade show booth space is rarely as simple as picking a size off a floor plan. Most exhibitors end up researching sizing, location, and interior layout as three separate problems, because most guides online only answer one of them. This trade show exhibit space guide brings all three together in one place: the standard booth sizes and styles you’ll encounter, a practical 10×10 trade show booth layout you can actually execute, and the zone-by-zone framework for how to use trade show space so every square foot works toward a real conversation instead of just looking full.
Whether you’re working with a tight 10×10 exhibit booth or a sprawling island footprint, the goal is the same: a space that guides attendees in, holds their attention, and gives your team room to do their job.
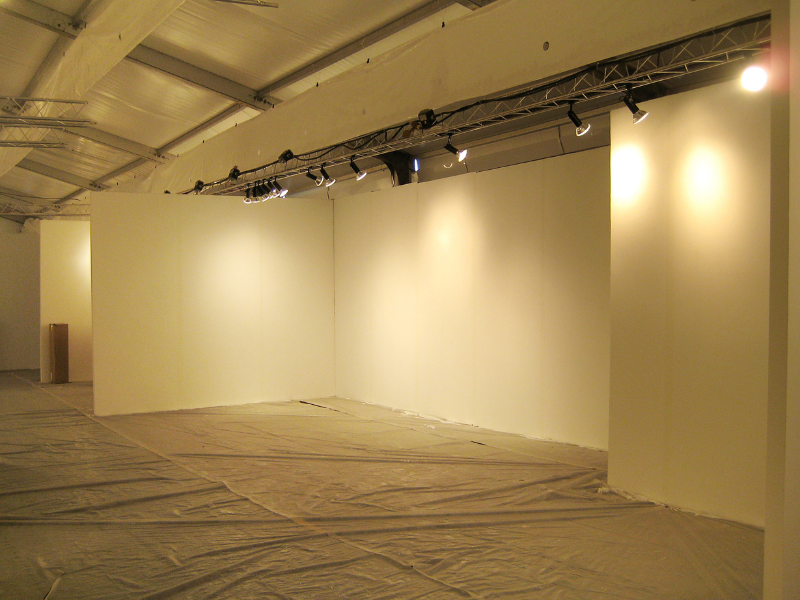
Trade Show Exhibit Space Guide: Understanding Your Exhibit Space Type
Before optimizing your space, you need to understand what type of space you have, because each configuration has fundamentally different traffic flow patterns, visibility considerations, and design possibilities.
| Space Type | Open Sides | Visibility Advantage | Primary Design Challenge | Optimization Priority |
|---|---|---|---|---|
| 10×10 Inline | 1 (front only) | Single aisle face | Limited depth, one approach direction | Maximize front-face impact |
| 10×10 Corner | 2 (front + side) | Two aisle faces | Splitting attention two ways | Consistent messaging on both sides |
| 10×20 Inline | 1 (long front) | Extended aisle presence | Using linear depth effectively | Zoning: attract + engage + convert |
| 10×20 Corner | 2 sides | More traffic exposure | Visual coherence across more panels | Anchor structure at the corner |
| 20×20 Island | 4 (all sides) | 360° visibility | Equal draw from all directions | Perimeter vs. core zoning |
| 20×30 Island | 4 (all sides) | Dominant floor presence | Managing multiple zones | Dedicated function areas |
| Peninsula | 3 sides | Three-approach visibility | Open back wall limitation | Strong side and front messaging |
Every trade show exhibit space guide worth using starts here, because size dictates everything downstream: staffing, budget, and how many of the interior zones covered below you can realistically fit.
Not sure which space type to select? Our trade show booth sizes guide breaks down every configuration with specific design recommendations for each.
Pure Exhibits designs every exhibit with the 3-zone framework built in. Talk to our Las Vegas design team about your next show.
Booth Styles: Inline, Corner, Peninsula, Island
Size tells you how much trade show floor space you have; style tells you how many sides of it are actually visible to attendees:
-
Inline: Row of booths where there are neighbors on both sides and to the rear. The front alone is left open, the most popular and economical choice, but with low visibility.
-
Corner: Two sides are exposed instead of one. Visibility is improved without spending too much.
-
Peninsula: Three sides of the booth are exposed, with only one side sharing a wall with another booth. It is often found in busy sections and can easily be combined with a powerful backwall.
-
Island: Four exposed sides with no neighbors whatsoever. Most visible and versatile type, but it needs to look good from any angle because a back wall that is visible from only one side is wasting 25% of the island booth space.
Choosing a booth style comes down to the trade-off between visibility and cost. It’s a choice that few exhibitors realize they have to make when they’re faced with the floor plan.
How to Use Trade Show Space Effectively: The 3-Zone Framework for Exhibit Space Design
The most effective trade show exhibits aren’t designed as a single undifferentiated space; they’re designed as three distinct functional zones, each with a clear purpose in the visitor journey.
Zone 1: The Attract Zone (Front of Space, Aisle-Facing)
This is the zone that earns the stop. Everything in Zone 1 should be optimized for one purpose: convincing an attendee to cross the threshold into your booth. Effective Zone 1 design includes:
-
A large header graphic image with a benefit statement of seven words or fewer, visible from over 20 feet away
-
Back-lit panels for maximum visibility in a busy and competitive visual environment
-
A motion component: looping video, live demonstration, or interactive component that draws people in
-
Open access: no furniture or barriers right in front
-
Overhead signage suspended from the ceiling, if allowed by your exhibit design and event guidelines
Zone 2: The Engage Zone (Middle of Space)
Once a visitor has crossed into your booth, Zone 2 is where the engagement happens. This is where your product lives, your demos run, and your staff start conversations. Effective Zone 2 design:
-
Product displays that sit at eye level (42-60 inches above the floor)
-
Demo stations where attendees can touch, feel, or experience your product
-
Interactive kiosks where attendees can explore your products via touchscreen
-
A counter where discussions can be held, located on the side, not in the middle
-
Brochures available but not overwhelming; your booth is not a brochure stand
Zone 3: The Convert Zone (Back or Side of Space)
The most important area in your display is the conversion zone – where your best discussions take place. In a 10×10, it’s nothing more than the rear wall with a counter. For a 20×20 island, it’s a separate meeting room or consultation lounge. Successful Zone 3 setup:
-
Seating: comfortable lounge seating or stools tell valuable prospects to “hang around”
-
Privacy: a partial wall or a divider provides sufficient isolation from the show floor to conduct business talks
-
Lead collection: this is where you have your tablet or badge scanning device – after the discussion, not before
-
Beverages (as allowed by show regulations): water, coffee, or small refreshments significantly extend dwell time
See our trade show booth furniture rental guide for zone-specific furniture recommendations.
Trade Show Exhibit Space Guide: Maximizing a 10×10 Exhibit Space
Most trade shows will offer you the most popular booth size that you can find – a 10×10 space. It is also one of the hardest spaces to maximize. However, you only have 100 square feet of room to capture your audience. This is how you can do it.
What Fits in a 10×10
-
One backwall display (8–10 ft wide, up to 8 ft tall in most venues)
-
One counter or reception kiosk (24–36 in wide, placed to one side of the front)
-
1–2 bar stools for brief seated conversations
-
One display pedestal or product showcase area
-
One tablet mount or small touchscreen for demos or lead capture
-
Total comfortable staffing: 1–2 people
10×10 Layout Rules
-
Never set your counter in the center – set it to the side so that you leave access to the center aisle
-
The back wall graphics will be your visual strength – put money into this element first
-
Make sure the floor is clean – just one literature rack and nothing else on it
-
Height is the key factor in 10×10; use all your 8 feet height to tower above competitors’ booths
-
Backlit graphics and header panels significantly improve visibility in cramped inline spaces
Maximizing a 10×20 Exhibit Space
10×20 trade show booth doubles the linear frontage – and thus provides the chance of completely utilizing the three-zone strategy. Most exhibitors who make their first attempt with a 10×20 either fail to distinguish the booth into various areas (which is wrong) or simply split the booth exactly into halves (better, but not ideal).
An ideal setup of 10×20 uses approximately 40% of space for attraction (full 4 feet of the front), 40% for engagement (middle demonstration area), and 20% for conversion (end of the booth with seating). The attraction area uses all 20 feet of the long front side, while engagement and conversion zones are distinct in the depth of the booth.
10×20 Design Considerations
-
Use a continuous back wall across the full 20-foot width for maximum visual impact.
-
Position a prominent kiosk or demo station in the center-front for maximum aisle draw.
-
One end of the booth serves as the ‘consult’ zone with seating for qualified conversations.
-
The other end accommodates product displays or additional engagement stations.
-
Staff efficiently: 2–3 people optimal for this footprint
Once you reach 20×20 booths and beyond, this trade show exhibit space guide suggests that you start considering real zones, as opposed to furniture placement, such as hospitality zones/lounges, an overhead banner for maximum visibility from afar, product zones, and finally, if your sales process needs it, a semi-private meeting room. Island booths that have dimensions of 30×40 and larger can handle more demos, a full bar setup, or even multilevel construction.
Maximizing a 20×20 Island Exhibit Space
In the 20×20 trade show booth space, exhibit space strategy finds itself in full use. With 400 square feet and four sides available for the visitor to view, you have a chance to make an entire experience around your brand, but the challenge lies in planning for that.
Island Design Priorities
-
Hang the hanging banner or sign to help identify your brand from afar
-
Ensure that there is aisle-facing visual appeal on each side of the island
-
Create at least 3 different zones, including the central zone, satellite zones, and consultation zone
-
Install kiosks around the perimeter of the island to capture aisle traffic before entering the island
-
Leave the central portion of the island open, and do not clutter the center with walls and furniture
-
Consultation room/consultation pod on the island offers privacy for meaningful conversations
See our island booth design guide for complete island layout strategies and our trade show booth design guide for visual design principles.
Ready to optimize your next trade show space? Pure Exhibits designs and delivers exhibit solutions for Las Vegas shows that maximize every square foot.
Common Exhibit Space Mistakes (And How to Fix Them)
Even experienced exhibitors make these mistakes. Check your current exhibit setup against this list.
-
Blocking the entrance: counters or furniture placed directly at the front threshold create a psychological barrier that reduces traffic flow by as much as 30%. Move all furniture back at least 3 feet from the aisle.
-
Overfilling the space: more furniture and product don’t mean more engagement. A crowded booth feels overwhelming; visitors often walk past rather than navigate through clutter. Edit ruthlessly.
-
Low graphics: graphics mounted below eye level (under 48 inches) have poor aisle read distance. Mount your primary panel so the top is at 7–8 feet whenever structure permits.
-
Staff sitting down: seated staff signal disengagement and create a visual barrier. All booth staff should be standing and positioned inside the booth (not at the very front blocking entry).
-
No conversion zone: many exhibitors generate traffic and conversations but have nowhere to take a hot prospect for a real business discussion. Always include seating for a minimum of 2 people.
-
Unlit exhibit: lighting is the single most underinvested exhibit element. A well-lit booth outperforms an identical unlit booth in foot traffic by a significant margin.
Show Floor Location Strategy
Where your booth is located on the show floor matters as much as what your booth looks like. High-traffic locations consistently outperform equivalent booths in lower-traffic areas.
Best Show Floor Locations
-
Near main entrances: highest general traffic, first impression for all attendees
-
Near restrooms and food service areas: high natural foot traffic throughout the day
-
Corner locations: two open sides, more visibility, more approach vectors
-
Near major anchor exhibitors: their traffic spills over to neighboring spaces
-
End-of-aisle positions: natural turn points that every attendee navigates through
Locations to Avoid
-
Near loading dock doors: lower quality traffic, often skipped by serious buyers
-
Dead-end aisles: any traffic that goes into a dead-end aisle needs to come out again
-
Near noisy exhibitors: loud audiovisual displays from a neighboring booth can drown out your talks
-
Behind pillars or low-hanging infrastructure: obstructs your view and signage
Read Also:
-
Peninsula Trade Show Booths: What They Are & When to Choose One
-
Las Vegas Trade Show Services: Exhibit space optimization for Las Vegas shows
Trade Show Floor Space Rules You Need to Know
Every serious trade show exhibit space guide should flag this, because it’s the part most first-time exhibitors miss until show services flag it during setup:
-
Height restrictions: Inline and corner booths usually have height restrictions of 8 ft on the rear wall, declining towards the aisle. Peninsula and island booths allow for higher structures, sometimes up to 16-20 ft in some cases, but it is always important to consult the exhibitor manual for your specific show, as restrictions may vary.
-
Sightline regulations: Most trade shows do not permit tall structures or signage to be constructed anywhere near the aisle side of an adjacent booth due to their sightline regulations. This impacts the placement of towers, banners, or hanging signage.
-
Aisle clearance fire code: Aisles should be kept clear of booth components, and many places have certain clearance requirements that cannot be blocked even for a moment during peak times.
-
ADA compliance: Pathways inside a larger booth, especially inside a multizone island booth, should allow for wheelchairs in most cases.
Checking this information before the design with the help of exhibitor services at your show helps avoid last-minute complications.
Conclusion
A trade show exhibit space guide is only useful if it helps you make three decisions at once: the right size, the right style, and a layout that actually works for how attendees move. Get any one of those wrong: an oversized booth with no zone plan, or a perfectly zoned 10×10 that violates the show’s height rules, and the space works against you instead of for you.
That’s exactly the planning Pure Exhibits walks through with every client: matching booth size and style to your goals and budget, designing a zone layout that holds up under real foot traffic, and confirming every regulation with show services before it becomes a move-in problem. If you’re planning your next show and want a floor plan built around how your space will actually be used, not just how big it looks on paper.
Talk to Pure Exhibits about designing your next exhibit space.
Let’s Build Something Extraordinary
Share your event details and we’ll craft a custom booth solution designed to captivate your audience and maximize your ROI.
Frequently Asked Questions: Trade Show Exhibit Space Guide
How do I make the most of a small trade show space?
Focus on vertical impact: use your full 8-foot height allowance with a tall backwall and header panel. Keep the floor plan open and uncluttered. Invest in backlit graphics for maximum aisle visibility. Position your counter to one side, never blocking the center. One well-designed interactive element outperforms a dozen under-optimized products.
What is the ideal layout for a 10×10 trade show booth?
Backwall graphic across the full 8-10 feet (backlit preferred), a counter or kiosk positioned to one side of the front, one display pedestal or product feature area, and a tablet or lead scanner accessible near the counter. Leave the center of the booth completely open for visitor entry and staff movement.
How many people can fit in a 10×10 booth?
Comfortably: 1–2 staff plus 2–3 visitors at once. With 2 people working the booth simultaneously, the space fills quickly, which is actually a natural conversation driver. For larger staff or visitor counts, a 10×20 or larger is recommended.
What’s the best booth location at a trade show?
Corner locations near main entrances or major anchor exhibitors offer the highest traffic volume. End-of-aisle and cross-aisle positions also perform well. The best available location at your target show changes each year. Contact the show organizer as early as possible for the best selection.
Should I upgrade from a 10×10 to a 10×20 booth?
Upgrade when you have a proven ROI at 10×10 and want to scale, you have more than one product or solution to demo, your team regularly has more conversations than a 10×10 can handle comfortably, or you want to add a dedicated consultation area. The 10×20 is the most common exhibit upgrade path.
How do I create zones in my trade show booth?
Designate three areas: attract (front aisle-facing zone with primary graphics and an interactive draw), engage (middle zone with demos and product displays), and convert (back or side zone with seating for consultations. Even in a 10×10, you can create a minimal version of this 3-zone approach.
What flooring should I use in my trade show exhibit space?
Options range from standard show carpet (usually included or available as an upgrade from the show) to interlocking foam tiles, raised platform flooring, and custom-branded vinyl flooring. Branded flooring visually defines your space from the aisle and is one of the most underused differentiation tools in trade show exhibiting.
How high can my trade show exhibit be?
In most shows, inline booths are limited to 8 feet in height. Peninsula and island booths typically allow up to 16–20 feet. Always check your specific show’s exhibit height restrictions in the exhibitor manual before finalizing your design; violations can result in mandatory modifications on setup day.
How important is booth lighting for exhibit space optimization?
Lighting is one of the highest-ROI exhibit investments. A well-lit booth consistently attracts more traffic than an identically designed unlit booth. Backlit graphic panels, LED spotlights, and accent lighting add perceived quality and draw attention in a visually busy show hall environment.
Can I block off part of my exhibit space for private meetings?
Yes, on islands and larger peninsula spaces, a partial enclosure (3-sided with open front) creates a semi-private meeting area without requiring special permission. In smaller inline booths, position chairs facing the wall or use privacy screens to create a sense of separation from the main show floor.
How do I use my trade show space to stand out from neighbors?
The most effective differentiators are: height (taller structures are visible from further away), lighting (illuminated graphics draw the eye from across the hall), distinctive color (brand colors that contrast with standard show carpet and neighboring booths), and a live demonstration or motion element that creates visual interest.
What’s the difference between inline and island exhibit space?
An inline booth is positioned in a row, with only the front face open to the aisle. An island booth is surrounded by aisles on all four sides, allowing 360-degree access and visibility. Islands are typically 20×20 feet minimum, allow taller structures, and create substantially higher visual impact at a commensurately higher cost.
Should my exhibit space have a reception counter?
Yes, for most configurations. A counter serves as a natural stopping point for visitors, a workspace for your staff, and a home for lead capture tools and literature. Position it to one side of the booth. Never directly in the center to keep the main traffic flow open.
How do I handle high traffic at my trade show booth?
Design for it: create multiple simultaneous engagement points (demo station + kiosk + counter) so staff can manage several conversations at once. Use a tablet or touchscreen for self-directed engagement when staff are occupied. Consider a self-service lead capture kiosk so visitors can register even without speaking to staff.
What’s the most common exhibit space mistake?
Blocking the entry. Furniture, signage stands, or staff positioned at the very front of the booth create a psychological barrier that significantly reduces visitor traffic. Keep the entire front of your booth completely open and accessible. Let visitors feel welcome to walk in rather than having to navigate around an obstacle.